Saturday, April 23, 2016


I had one day off before having to work a 6 day stretch. The weather was warm and sunny, so I headed out for a ride. I had no particular direction in mind but the wind helped me determine my first turn towards Whippoorwill Rd in the hopes that it would be a bit sheltered.  As I was traveling along Whippoorwill I passed a small parking area with a map of the trails that it led to. On the map they showed a dirt road so naturally I had to check it out. Well the road proved to be less extensive than the map led me to believe and every off shoot soon became too rough for the likes of me. Never the less it was a good warm up.


At this point I decided I would head over to Ashlawn Farm to get a frozen coffee drink. As I headed up the multi use path over the bridge there was a RUSA sign announcing a rest stop feast just around the corner. Looking up the path I saw two randonneurs. Well the thought of some sort of a brevet route coming through my neck of the woods peeked my curiosity so I kicked it into 2nd so I could catch up to the riders up ahead. I passed them on the bridge and a little bit later the male rider passed me. We continued back and forth like this for a while and at one point I asked him where he had come from. He told me he had come from Westfield  Mass, holy crap no wonder I passed them on the up hill of the bridge!  A 300 km brevet is 190 miles!  RUSA's idea of just around the corner turned out to be about 3 miles to Saybrook Point Monument Park.  Later I learned it was the Old Saybrook 300 km hosted by Berkshire Brevets . Old Saybrook was the midway point control before the randonneurs headed back to Westfield.


After I discovered where the control was I meandered around Saybrook point. That's when I discovered a thorn in the sidewall of my front tire. Of course I was compelled to pull it out, at which point sealant began bubbling out. I don't have a tubeless set up and on the Soma I use tubes with Schrader valves which aren't ideal if your going to put sealant inside the tube, but it is possible to remove the core from a schrader valve.


I decided to put sealant into my tubes after one too many sharp metal objects had pierced  my tire and tube. Now the sealant was put to the test. I wiped away the bubbling sealant but it just came right back, so I decided to pedal up the road a bit then stop and check the tire again. Less than 200 ft later I stopped and the sealant was still bubbling, so I leaned the bike to the side of the hole for a moment and spun the tire. At that point the sealant seemed to be congealing so I went on my merry way. Ten minutes later I arrived at the coffee shop. No doubt the tire had lost some pressure but the tube seemed to be sealed. After wiping away the dried sealant I could no longer see any signs of the piercing.


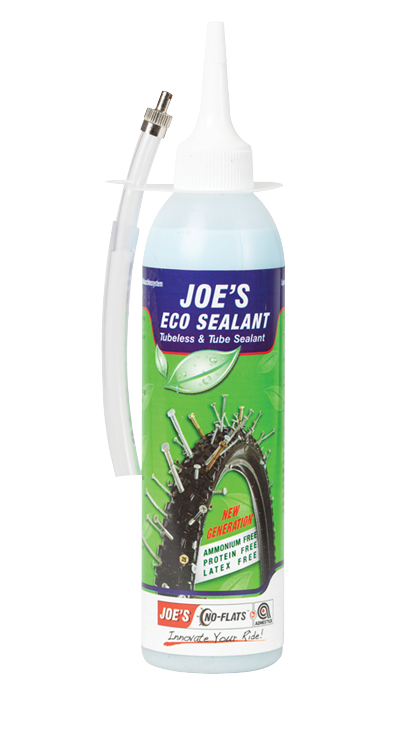
I know there's dry rot on the side walls but I have never had a problem riding tires like this. I will take a closer look at the tire and tube in the near future but several days later it is maintaining it's pressure. I use Joe's eco sealant
 It doesn't contain any latex and I believe it is better for use inside tubes than some of the other sealants on the market that ball up after about 6 months.

Monday, April 4, 2016

Bridgestone MB-2

Yep I did it again, started a bike project without taking pictures first. I purchased this 1992 MB-2 last winter. The bike was in good shape but the paint and decals were shot. It must have spent a lot of time on a bike rack because it was scratched beyond anything I've ever seen. The former owner did make some attempts to touch up the scratches with blue and black paint, yikes!  As usual I started cleaning the bike, then out came the rubbing compound. One thing led to another and parts started coming off. Ultimately it led to a full paint job done by me and Testers.


I made my own decals, which is why the down tube decal isn't true to the original on the MB-2. I printed the decals on waterslide paper, applied clear coat to keep the ink from running off the paper and then applied them to the frame. It's a real pain and I don't think I'll try it again.  

Originally I tried to set the bike up with drop bars but ultimately I couldn't overcome the extra long top tube. At 24 inches it's 2 inches longer than my other drop bar bicycles. The 49 cm frame came with a long stem, straight riser handlebars, and grip shifters. The stem may have been original but the grip shifters and handlebars were not. I originally tried a Nitto Technomic 50 cm stem on the bike but switched to the Nitto Dirt Drop stem to try and get the handlebars higher with the drop bars installed.


I used a pair of inexpensive plastic fenders I had hanging around. I cut the rear fender shorter since there's nobody ever riding behind me. On the front fender I made and extension to the existing mud flap using a piece of old tire tube and some rubber used to make gaskets. It's a bit of a kludge but provides a bit more protection than before.


After riding the bike for a while I realized I was using the middle 34 tooth chainring with a 7 speed 11-28 cassette 98% of the time. So I decided to go to a 1 x 7 setup. At the time I had been borrowing a rear wheel from another old mountain bike because the rim that came with the MB-2 was shot. I had my LBS replace the rim, unfortunately I didn't know that the rear freehub body was dried out until I put a new cassette on and gave it a spin. It spins fine but is rather loud due to the lack of lubrication. I tried to service it but it requires a special tool that Shimano no longer makes. There is a way to make a tool (thanks You Tube) but I haven't gone that route yet. Since this bike is supposed to be for bad weather I decided to just ride it as is. When the hub dies I'll replace it. Who knows how long it will last. My goal with this bike was to use the parts I had on hand with a few exceptions, IE: the rim and dirt drop stem. Also when I made it a 1x, I had to change to a shorter BB, a 38 tooth chainring, a Sugino chainring guard, and a 11-34 cassette. 

I had the Rivendell Saddle Sac and the Brooks B68 saddle which is no longer made. If you want a wider Brooks saddle you now have to buy a sprung saddle!  The Saddle Sac makes a nice trunk.

Nitto Dirt Drop - MT-10, is the tallest of all the 1 inch quill stems. 35 degrees of rise, 100 mm extension and 155 mm from minimum insertion. Picture a heavy duty Nitto Technomic stem inserted to it's minimum insertion mark, which gives you 6" of rise, then take 80 - 100 mm of extension and angle it up 35 degrees, that's the Nitto MT-10 in a nutshell. I should say that is the MT-10 long quill in a nutshell. The short quill Dirt Drop has only 90 mm from the minimum insertion mark. The shorter version seems to be more commonly found. I found the long quill at http://www.benscycle With the swept back handle bars I'm not even close to using all of the stem's potential height. 


I made handlebar grips from remnants of used Brooks leather tape wrapped around bits of gel pads. The additional grip areas are wrapped with Newbaums cloth tape with  two coats of clear wax free shellac to keep the tape from fading and fraying.


Grip shifters are hardly a classic look but they are as easy to use with bulky winter gloves as they are with bare hands. I also like the fact that you can shift several gears at once like a friction, or indexed bar end shifter. You can't do that with rapid fire shifters which is kind of ironic. The front derailleur also gets a bit of trim with grip shifters, rapid fire shifters don't allow for any trim. Sometimes I think the bulky collar of the grip shifter is kind in the way of my hand space but other times I think it provides I nice place to keep my hand from slipping forward. When I finally have to replace the rear hub the shifter will also have to be changed because newer hubs are 8,9,or 10 speed compatible and I won't try to rig it with a spacer just to keep it 7 speed.

The handlebars are Civia Duponts that I had hanging around. They are very similar to the Nitto Albatross handlebars except they are 22.2 mm wide readily accepting shifters and brake levers used on mountain bikes but they are too narrow for bar end shifters.

The MB-2's frame and fork were constructed with Ritchey Logic Prestige tubes, and the rear diamond was constructed with Logic CroMo ,unlike the top of the line MB-1 which had 100% Ritchey Logic Prestige tubes. From what I've read the logic tubes had shorter butts allowing longer thin sections. 

The Deore XT linear pull brake was an upgrade that the previous owner made. Oddly he had it mounted in the rear using the left hand brake lever mounted upside down on the right side. The original cantilever brakes were mounted on the front with their original lever. I just flipped the brakes and levers around. Since the front brake is generally stronger I wanted the superior linear pull brake up front. I replaced the rear Dia Comp cantilever that was part of the MB-2's original set up with an Avid Shorty that I had in the parts bin. If nothing else they are easier to set up with adjustable spring tension for centering the brake arms and shoes.


The original Deore XT rear derailleur and Specialized crankset remain. Both wheels were replaced at some point and from the looks of them with their purple alloy nipples and wheelsmith spokes I think they were built by my LBS. Below is a list of the original build specs. 


The complete Bridgestone 1992 USA catalog can be found here:
 http://www.sheldonbrown.com/bridgestone/1992/1992.pdf
A Wald medium basket is zip tied to $12 Sunlite Gold Tec front rack. Also zip tied to the rack is a piece of the old handlebar with corks plugging the ends, which gives me a place to mount my headlight under the basket.

So all and all with the various changes I'm probably out of pocket $300 for the bike and parts. I'm sure there will be more changes to come. As anyone who is a big enough bike geek to read all this knows bikes can go through several iterations before they finally settle into their final state.


                                            Happy riding


Friday, March 25, 2016

Errandonnee March 13th 2016, Wrapping it up


Sunday March 13th, I headed out around noon, once again it was a beautiful day to be out on a bike. I decided to change up my usual route to work by taking Whippoorwill Rd. Although this is probably a bit of a shortcut I don't usually go this way because it is slightly hilly, which may cause the "shortcut" to take longer. 

As I was riding along Whippoorwill I saw two cyclist out in front of me quite a way. As so often happens I decided to see if I could catch up to them. As I got closer I could see it was a man and a woman resplendent in hi-viz jacket and vest. Eventually I was able to catch and pass them while pedaling up hill. This doesn't happen often but when it does it's always fun. They were clipped into their carbon fiber bikes while I was riding a 1992 mountain bike in "street clothes" and sneakers.


I stopped for lunch at Coffee's it was pretty busy even though it doesn't look that way in the photo. All the action is to the right complete with outdoor seating. While I was sitting outside I noticed that the couple whom I had passed had also stopped for a bite to eat. Another woman who was on her way inside noted my Brooks saddle as she walked by. When she came out she stopped to take a closer look at my bike. She was quite interested in my saddle sac from Rivendell Cycle Works. After lunch I took my usual route on the Post Rd to work in East Lyme.

    The bosses cat greeted me at the office door.  
                      On my way home I stopped at my sisters house for a visit.

After visiting with my sister I once again veered off my usual route taking Four Mile River Rd to Rte 156. I made a slight detour to explore


        This dirt driveway is only about 1/4 mile long,but I had to check it out. There's just not that many dirt roads close to home. 


                 After a brief stop at my house, I headed out to get dinner and a birthday cake.

                     It's a bit of a crunch stuffing two pizzas into a medium saddle sack.                      


                                       Loaded up and ready to head home and I have my headlight


                               Pizza, salad and cake time for a birthday party.

           Total Miles  - 34.75
11.  Social - Stopped for lunch at Coffee's Deli
       Observation - Lots of other cyclist had stopped for lunch at   
       Coffee's, but half of them had their bikes parked on top of their cars :)
12.  Work 
       Observation - The bosses cat was waiting at the front door.
13.  Social - Stopped by my sisters house for a visit.
14.  Wildcard - Picked up Cake at the bakery.
        Observation - Finally put my headlight on my bike :)
15.  Personal Business - Picked up Pizza and Salad
       Observation - Two 12 inch pizzas get a little crunched when 
       you stuff them into a medium Rivendell Saddle Sac.  
 
       http://www.mapmyride.com/routes/view/1022978591
  Note - the bike used to complete the 2016 Errandonnee challenge was a repainted 1992 Bridgestone MB-2 that was rebuilt for errands, bad weather and fun. Together we rode 83.75 miles for the entire challenge.

Tuesday, March 22, 2016

Errandonnee March 11th 2016


Friday March 11th the weather was decent so I decided I would ride to the chiropractor's office as I often do. Because I was in the midst of an errandonnee challenge bringing some clothes to the local donation container was a no brainer. As I was riding I noticed that I forgot my headlight again. I meant to grab it but my arms were full with clothes on my way out the door, and that was that.


I arrived at the chiropractors office a bit early so I went across the street to Finders Keepers to kill some time. While I was there I found a side table for $20. It would need to be stripped and refinished but the price was right. Unfortunately I didn't have enough cash on hand, so I put a deposit down. She agreed to hold the table if I would pick it up the next day.

You can barely make out the sign for Bank of America
                            
There was about an hour of daylight left when I finished at the chiropractor so I rushed over to the bank. It was tough to get a picture for the errandonee challenge without getting other people in the photo who might not want to be photographed. I got back to Finders Keepers just before she closed for the day.  

Since I was working all of the next day in a completely different direction I decided to take the table right then and there. An older gentleman at Finders Keepers admired the set up of my bike and its utility. He also suggested that I might want to get a child trailer to bring with me when I know I'm going to be picking up larger items. Ah, well there's the rub I wasn't planning on purchasing a table and that's the way it usually is. You just never know what you might come across when you're out on your bike.

After a few false starts I figured out the best way to strap the table to the back of my bike with the 2 tie downs I had and the 2 leather straps used to close the saddle sac. I put the drawer of the table in my front basket with my purse weighing it down a little. I tied the purses strap to one side of my basket. This arrangement kept the drawer from bouncing out of the basket.

Nice to see the reflective cables on my bike showing up so well in the camera's flash.


        Total miles - 13
6.   You carried what on your bike
      Brought some clothes to the local donation box
      Observation - I forgot my headlight again!
7.   Non-store Errand - Finders Keepers
8.   Personal Care - Chiropractor 
9.   Personal Business - Bank
      Observation - ATM's are really busy on Friday evenings.   
10. You carried what on your bike - Brought a telephone table  home from Finders Keepers.              
      Observation - Carry more straps and bungees on your bike. Also saw three deer in a field who were all staring at me the crazy lady with a table on her bike.


Tuesday, March 15, 2016

Errandonnee March 9, 2016


The forecast called for unseasonably warm temps on Wednesday, so what better way to spend it than on a bicycle errandonneering. My first stop was bottle returns and lunch. Both could be conveniently done at the Big Y.  I went to the Big Y in Old Saybrook rather than the one in town because Kolhs is located next door and I had some birthday shopping to do. Once I was over the Baldwin Bridge I headed to Bokum road which exits onto rte 153 in Essex. Bokum is a quiet curvy road with soft easy ups and downs which I prefer compared to the more direct busy roads.

Big Y to the left, Kolhs to the right

No luck finding a gift so I decided to go to Goodwill in Clinton then double back to Tanger Factory Outlets.
               

The weather was sunny and 60 degrees on a March day in Connecticut, so on the way back from Goodwill I did a little exploring of roads unknown to me like Indian Trail which led to Grove Beach.

Grove Beach


Old Clinton road eventually led to McVeagh road where I explored a park with several athletic fields. My phone was just about out of juice so I turned it off in case of emergency, but a nice lady walking her dog helped me get my bearings and gave me directions to Tanger Outlet.

Tanger Factory Outlet


After perusing several stores I finally found the birthday gift I was looking for.  With my phone off and no computer on my bicycle I didn't know exactly what time it was, but the sun was looking low in the sky. Now my decision to leave my headlight at home was looking like a bad one. No time for dilly dallying anymore, the most direct was prudent and I still had daylight when I went into my final two stores. This time it was the Big Y in Old Lyme. What..? Yes always save the grocery's for last so cold stuff stays cold, plus it's better for you and the grocery's if you don't drag them around all day.

Final stop at the package store, running out of day light


I rode home in the dark with my tailight and little purple spoke lights on but no headlight! It's a good thing I know the roads of the final stretch so well. Still I was grateful when I could use the light of the cars coming from behind, especially in darker patches.
http://www.mapmyride.com/routes/view/1012737609

Total miles - 36  
1. Non-store errand - bottle returns / lunch  
Observation - The Big Y in Old Saybrook has both indoor and outdoor tables.
2. Store errand - Goodwill 
Observation - It was pretty busy
3. Store errand - Big Y in Old Lyme
Observation - The beer at the Old Saybrook Big Y was less expensive hence my trip to the package store.
4. Personal Care - Getting out on my bike on the nicest day of the year so far.
Observation - Deciding not to bring my headlight because I would surely be home before dark was a bad choice.
5. Wildcard - Exploring some unknown routes.
Observations - I learned that Westbrook high school and middle school are located on McVeagh road.

Note - Although I visited more stores than I can even remember the rules state each category can only be used twice.

Sunday, March 6, 2016

Leap Day Meander


On Monday February 29th we all got an extra day and it was a good one to be outside here in southeast Connecticut. A lunch time shower was forecast to pass through the state, inconvenient but the kind of rain you can wait out. With that in mind I headed over to Old Saybrook to run some errands and enjoy the mild temps. I spent an hour or so in the coffee shop while the showers passed by. Once all was clear I headed home. I may not ride in the rain deliberately but it's still good to have fenders for the times when you get caught or the roads are just wet from fog in the early morning.


           It was too nice to ride directly home so I rode down to the DEP boardwalk on the Connecticut river.


            Since I last posted about my Soma San Marcos I have made a couple of changes, the obvious one is the medium Wald basket. An addition to the basket I changed from the Nitto Randonneur handlebars to Velo Orange's Chris's rando handlebars. Mostly because I wanted a wider drop handle bar.  I'll have to write about them in more detail in another post.


Monday, January 18, 2016

Classic Meets Modern

Almost 2 years ago I acquired what I believe is a 1979 Peugeot PV10 .  Searching through various online catalogs I found this Picture of a PV10.  It is from a 1979 French catolog and was the closest match to the components that were on the bike. Using Peugeot's serial numbers to date a bike is said to be a bit dubious but, going by the serial number, decals and components It would appear to be circa 1979


 The bike as I came by it had everything in the picture accept the seat post, saddle and pump. As far as I'm concerned it was lucky that I stumbled upon this bike in my size while I was visiting my local bike shop. Most of the bikes on craigslist these days are low end or overpriced.


  Here's a picture of the bike after I began to rebuild it. I should of taken photos of it before I did anything but I get so excited when I get a new project that I forget to document the original bike before I start to clean it up and rebuild.


Stronglight 105 Bis Crankset with 52 x 42 chainrings. Love the drillium!


Mafac non aero brake levers with more drillium


New rear wheel on the left next to the original on the right


The original wheels were Mavic 700c tubulars with Normandy hubs and a Malliard 5 speed freewheel.  I thought a long time about the way in which I would rebuild this lovely old bike. I toyed with the idea of riding tubulars, and tried to figure out a way to keep the cool Stronglight cranks. Ultimately I knew the 42 - 52 chainrings were just too large for me to ride up hill. Even if I used a 12-36 cassette my lowest gear would be about 31 gear inches which for me just isn't low enough when climbing longish steep grades. So I had a new set of wheels built with Mavic Open Sport rims, Ultegra hubs, Ultegra 10 speed 12-30 cassette, Wheelsmith butted spokes and alloy nipples. Practical wheels which suited the bike but allowed me to use clinchers. The tires I selected were 28 mm Grand Bois, Cerf, Extra Leger. 


I replaced the Stronglight cranks with Velo Orange's Grand Cru 50.4 BCD 46 x 30 cranks.  I think the they look appropriate for a bike of this era. The 46-30 chainrings combined with the 12-30 cassette gives me a gear inch range of 26.7 - 102.2 

Because of the french threading it was fortunate that I was able to use the existing loose ball bottom bracket and spindle with the new crankset.  Since I spread the rear dropouts 4 mm to accommodate a modern cassette hub it would have been ideal if I had a slightly longer spindle to compensate for the change in the chainline. That was not to be the case so the shifting is slightly compromised.  Meaning the chain will rub on the next chainring when shifted to the furthest sprocket. Of course one is always advised to avoid that sort of shifting anyway. 


The only original parts that were used were; the bottom bracket, headset, and brakes. The original pedals were Atom with french threading so they can only be used with the original crankset. The Peugeot stem was too short for me and the Phillipe handlebars just weren't as comfortable as the Nitto 115 that I replaced them with.  I kept the Weinmann 605 sidepull brakes because I didn't want to alter the frame in any permanent way by drilling out the brake mounting holes. Modern brakes have recessed bolts not the nutted bolts common on most older single pivot brakes. Also the reach is longer than most modern dual pivot brakes. I would have used the original front derailleur but it was a cheap plastic Simplex common on Peugeots in the 70's and broke in my hands when I picked it up! 


Down tube shifters just aren't my thing and I had a perfectly good set of ShimanoTiagra 4600's lying around so that was kind of a no brainer. The front and rear mechs were used Shimano 105 and Ultegra respectively that I picked up at the bike shop.  The 26.6 seatpost was an oddball size that limited my choices so long setback wasn't going to be an option. Without a long setback seatpost a Brooks saddle was out of the question for me. I made a lucky guess and ordered a Selle SMP TRK which I found to be comfortable.  


Even with the modern drivetrain I feel the essence of the bike was maintained. Velox bar ends and a tool roll attached to the saddle with a Christophe toe strap give a slight nod to the era.


Friday, May 2, 2014

Soma San Marcos, an in depth review

This is my 51 CM Soma San Marcos purchased and built in Late September 2012. Built as an alrounder with a retro / randonneur vibe. For those who may not be familiar, the San Marcos was designed by Grant Peterson of Rivendell Bicycles for Soma Fabrications.
ALERT - this post is filled w/technical data that some may find boring. If you just want to know about the overall feel of the bike, just look at the pics and skip down to the final few paragraphs.


The Obligatory garage door photo


Even before my Cannondale was stolen from my garage I had already been searching for a new bike. I was looking into a semi custom Gunnar and playing with the geometry on bike CAD when I discovered the Soma San Marcos. I plugged the specs into Bike CAD and realized the San Marcos would give me the fit I was looking for at a much lower price, $800 vs $1650. Some may argue that there is a difference in quality between the two frames. The San Marcos is Tange Prestige with a Tange Infinity fork, while the Gunnar's are made from True Temper. I believe the main tube thickness for the San Marcos is a respectable 9/6/9. The feel of the Tange is compliant without being noodlish. I decided to pull the trigger and started collecting parts for the build.


Steve at Niantic Bay Bicycle built the 650b wheels at my request with Synergy machined side wall rims, Ultegra hubs, Wheelsmith double butted spokes and alloy nipples. At the time Velocity's 650b Synergy rims were the lightest ones available but the machined side walls were on back order for quite awhile. Eventually they came off back order and the build began.
The astute may notice dry cracks on the sidewalls.
I originally purchased a set of Dia Comp 610 center pull brakes, but the brake arms did not reach far enough on the rear. I lucked out because the shop had a rear Paul Racer hanging around. It had been too short on another build, so I got it at cost!  As you can see in the photo, the Paul Racers are just barely long enough.

Classic Rivendell Lugs
About 9 months after the initial build I up graded the front brake to a Paul Racer. I immediately felt a significant difference in the braking power.

Cane Creek 100 Classic threaded headset and a Funky Monkey
Even before I up graded the front brake, I changed the cable hanger to a Paul Components Funky Monkey. It kinda of sounds like a Ben and Jerry name doesn't it? Weird name, nice product.  

The Funky Monkey's barrel adjuster is by far the easiest to adjust of all the cable hanger barrel adjusters I have tried. The added length of the Funky Monkey reduces the amount of cable running from the barrel adjuster to the brake reducing the potential for cable shutter on a larger bike. 
Being able to adjust the Funky Monkey's barrel adjuster easily is vital since I've found it necessary to loosen it in order to open the brakes via the quick release when I want to remove the wheel.

Shimano 105 STI Brifters
Initially I had set up the bike with Shimano Tiagra brifters, since I had used them on the Cannondale and found them to be adequate. The new, at the time 4600 Tiagra line had just become 10 speed and had benefited from the higher end components trickle down affect.  The Tiagra's price point was a little easier to handle at the time of the initial build so that is what I put on the bike. The 4600 Tiagras had a different shape from the 4500 Tiagra I had on the Cannondale but I got used to it and found they shifted well with the 105 rear derailleur and IRD Alpina front derailleur. I later changed to the 105 brifters pictured above.

To me the 105 brifters have a nicer shape which is both more comfy and visually more appealing. The 105's also pull more brake cable thus increasing modulation. The cables exit at the handle bar making it easier to mount a small bag. One note about the 105 shifters, when shifting from the small 24 tooth chainring to the 36 tooth ring I have to give the shifter 1.5 shifts to get it to shift up to the 36 tooth ring. Interestingly with the Tiagra shifter the front derailleur was able to shift to the middle ring with only 1 shift. It was a little slow but it got there in one swing of the brifter's arm. Perhaps the extra turn the cable makes inside the brifter to allow it to exit at the handle bar creates just enough cable friction to cause this sub-optimal shifting with non Shimano parts. 

Note the flare of the 105 shifters

I had purchased a Nitto Randonneur handle bar for another bike, so when I was changing the shifters I decided to try them. Originally I had used the Nitto B115 drop bar, but I wanted a little more length in the ramps. I really love the shape of the Randonneur bar, the flare is very comfy and creates a sort of hip at the first bend. The increased length of the ramps allows me to move my hands more and gives my whole body a choice to be more upright or more aero.

Funny how one change leads to another.  After I changed the handle bar to give me what was essentially about 10 cms more reach I found I wanted my Brooks saddle setback more.  Sadly I removed the beautiful Thompsons zero setback seat post and replaced it with an old Sun Tour seat post w/setback which I found to be much more comfy. Eventually I changed to a Velo Orange Long Setback seat post which allows micro adjustments to the seat angle.


Velo Orange long setback seat post with Brooks saddle set all the way back.


Lovely Nitto Randonneur handle bar and a Nitto stem

The final change to the original build was the fancy gold Jagwire housing. I had to change the cables since I was changing shifters so I decided to go ahead and change the housing too.


Paul Components Light mount with Light & Motion Urban 550 light attached.


Here is the final Paul's product I have on the San Marco. It's their light mount which I have stuck a handle bar plug into and mounted it to half of an old brake arm, which I then mounted to the front rack. I used the brake arm to allow the light to be mounted a bit lower which makes it much easier to remove when needed. Otherwise it would be dead level with the rack, which sometimes causes interference with items on the rack. I like having the light mounted at tire height beneath the front rack.  You can see the road well without shining your light into the eyes of oncoming traffic and the cargo on the rack never interferes with the light's beam.

My front rack hack 


I only have one beef with Soma. Why didn't they have midfork braze-ons in the first place?  The new 2014 models all have midfork braze-ons, but the original models didn't.  So you have two options, use p-clamps to mount a front rack or get a different rack that allows you to mount to the dropout eyelets. The later is what I chose to do, although I think such an arrangement may increase the fork's stiffness.

  Originally I had a small cut down Wald basket mounted to the rack. This was quite convenient but baskets can also cause limitations in regard to the size of the load you can carry.  IE. I couldn't carry a 12 pack flat on its side. Thus my rack hack was born. It is the top part of the Wald basket bent to approximately a 10 x 10" square which I clamped onto the Velo Orange front Constructeur rack. 

Front rack in use, semi wet rain gear on the bottom with stuff from store on top all strapped down with a basket net.
The VO. Construteur front rack is quite strong and light at 425 grams. 

note the way the rack attaches to the fender in two places

I also installed a VO. Construteur rack on the rear of the bike. At 365 grams it is one of the lightest rear racks available. It is a bit small at 4.3 x 10.23 inches, the hooks of my inexpensive panniers just fit on the rails.  The rack is mounted to the fender and the rear dropout eyelets which is surprisingly sturdy.
 

Velo Orange Cranks and touring pedals
The crankset is a Velo Orange triple with 24, 36, and 48 tooth chainrings. I love my triple, combined with an Ultegra 12-30 cassette it gives me 21-105 gear inches. Now that's range!  I'm also quite fond of the VO. Touring pedals. They are super light at 236 grams for the pair while being plenty comfy and grippy. 

As I mentioned earlier I am using an IRD Alpina front derailleur. I chose the Alpina because it is supposed to provide better shifting with the smaller 48 tooth outer chainring. Perhaps if I ran a Shimano 105 front derailleur the shift from the small to the middle ring would be cleaner?  I wish Shimano would be like Sram in regards to having the same amount of cable pull for the road and mountain shifters.  This would allow both groups to be interchangeable and make it easier for someone like me who prefers to run smaller chainrings with STI shifters. 

All that being said, I don't spend a lot of time in the smallest chainring.  Most of the time I only have to shift from the 24 to the 36 tooth ring when I start out in the morning, since I park the bike for the night with it in the smallest chainring and sprocket.


The final bit of Velo Orange bling are the hammered fenders. Initially I had the VO. Zepplin 52 mm fenders for 650b wheels mounted but they were really wider than needed for 32 mm tires. Also it was my first time mounting a pair of aluminum fenders, hence errors were made. Here's a tip for anyone who has never installed metal fenders; squeezing the width of the fender to make it narrower effects the radius, essentially making it larger. I Eventually got the Zepplins installed but decided to change to the 45 mm hammered fenders later on.

I like the look of both fenders but the hammered fenders hide small scratches. I attached a Spanniga Pixeo Xba tail light to the rear fender, which required 2 holes to be drilled.


My first set of tires were Hutchinson 650b x 32 mm. I managed to get about 2300-2700 miles out of them before I had to replace the rear tire which was just about ready to go. Currently I am using the Grand Bois 650b x 32 mm Cypress tires. As you can see in the photo above, the sidewalls are getting cracked and dry. I also have a couple of small gashes in the tread of the rear tire, but I still have quite a bit of tread left. They have been run for approximately 2000 miles. 

 Soma San Marcos with the original build June 2013
So that's pretty much the build and some of my thoughts about it but what do I think about the finished product and the frame itself?  After riding 4500 miles I can say I am completely in love with this bike 95% of the time. The other 5% of the time I wished the bike were a bit lighter.

It's not really a heavy frame at about 6 lbs for the frame and fork, and I tried to select the lightest parts I could while still having all the features I wanted. Before I put the racks, kick stand and bag with gear on the bike it weighed 26 lbs.  Once I added the racks, etc. the bike gained 5 lbs. To loosely quote Grant Peterson,"it's hard to build a useful bike for less than 30 lbs".  The five percent of the time when I wish it were lighter I'm usually carrying some weight and/or going up hill or against the wind.

Lets get back to the 95% of the time when I am completely smitten with this bike. First thing is the fit, it's everything I hoped it would be. When I first started riding this bike It was like it was made for me. The Cannondale fit me pretty well once I had the stem extender installed, so that was my starting point when I started plugging dimensions into bike CAD. The San Marcos is 2 cm longer in the top tube, which I was a bit worried about, so I used a shorter 50 cm stem. Once I started riding the bike I was happy to have a little extra room to stretch out. 

 I am using a Nitto Technomic stem with about 4 inches of rise. Let me first say I love the threaded stem with it's ease of height adjustment. Also I personally prefer the aesthetic of a threaded stem. I must also compliment the geometry/design that Grant Peterson used on this bike. With a longish head tube set at  71 degrees, the higher you raise the stem the more it moves back towards you, effectively shortening the reach.

I also love the slacker seat tube angle of 71.5 degrees. That is an angle that is extremely hard to come by in a 51 cm frame, the typical angle is 74-75 degrees. My knees appreciate the slacker angle and I doubt that I would be able to use a leather saddle with their usually shorter seat rails if the seat tube angle was any steeper. 
 
 
Another uniquely Grant Peterson design is the lower bottom bracket height. With my seat set at maximum height for me I am still able to comfortably put my toe down while remaining seated at a stop light. The bike suffers no  clearance issues due to the lower bb. On the contrary I have ridden it through wooded trails filled with rocks and roots with nary a problem. 

The ride is sublime. It rides like a Cadillac, smooooooth.  I'm sure it must be the combination of the Tange Prestige steel and the supple 650b tires. On the road the ideal tire pressure for me is 60-55 psi in the rear and 40-35 psi in the front. Being a 51 cm bike I'm sure it is stouter than it needs be since a small diamond frame is inherently strong. On the other hand I have no worries that the tubes will dent easily and I have full confidence it can handle any load I pile onto it.

Aesthetically I never grow tired of looking at this bike. The color is a pearlescent turquoise which photographs more like a light blue. It is a difficult color to capture.  

Unless I one day have a custom frame built for myself, I am sure I will be riding the San Marcos for a long time.